Showing posts with label DIY. Show all posts

Monday, 16 June 2014

Zakka Pdf patterns

I have recently updated and re-designed two zakka patterns for sale on my etsy shop. I'm very happy with the updated graphics and layout here is a sneak peak at what is new.


Tissue Pocket

 This very Cute tissue pocket fits pocket size travel tissues 7 1/2 cm X 11cm...... A great pattern to make gifts or to put in your handbag, babies bag, office or car

Great for a beginner sewer.

Includes
-6 page pattern in PDF format
-List of materials needed
-Full size printable pattern piece just Print and Sew! (No need to enlarge or resize!)
-Photographs that show each step with written instructions
-can be viewed on an ipad or tablet


Size of tissue pocket 12.5cm length 9cm width


 https://www.etsy.com/au/listing/192852427/tissue-pocket-pattern-download-pdf?

little fukuro


 Little Fukuro HOOT HOOT

This listing is to purchase a PDF sewing pattern for making cute little owls. It's a easy and fun pattern great for any beginner sewer. Can be made by sewing by hand or sewing machine.

Includes
-13 page pattern in PDF format
-List of materials needed
-Full size printable pattern pieces just Print and Sew! (No need to enlarge or resize!)
-Photographs that show each step with written instructions
- Can be viewed on ipad or tablet

Finished owl is approximately 7cm high 7cm wide at base


 https://www.etsy.com/au/listing/192754702/little-fukuro-owl-pattern-download-pdf?

Sunday, 5 August 2012

Tissue Pocket Tutorial PDF- Etsy

Hi everyone I have just relesed for purchase my tissue pocket PDF Pattern and tutorial on Etsy.
This very Cute tissue pocket fits pocket size travel tissues 7 1/2 cm X 11cm...... A great pattern to make gifts or to put in your handbag, babies bag, office or car

This pattern includes step by step tutorial and photographs on how to make your very own Tissue Pocket.
Great for a beginner sewer.

Includes printable pattern to cut out and use.

Size of tissue pocket 12.5cm length 9cm width


For more information please visit:
https://www.etsy.com/listing/104895087/tissue-pocket-pdf-pattern


Monday, 26 March 2012

How to fix a broken Sizzix


 OH NO my sizzix broke !!!

I went to use my sizzix today and the handle turns but then jams and gets stuck noooo.....
I looked to see if something was stuck in the rollers but I couldn't find anything, so I thought I better pull it apart and see what the problem is. So this is a tutorial on how to safely pull apart your sizzix and fix it. 

Tools
Allen key
Phillips head screwdriver
Sewing machine oil
Small brush


 Step 1
 Remove the black cap off the handle end
Step 2
Using the right size allen key undo the screw and 
slide the handle off
  Step 3
Using the Phillips head screwdriver undo the screw shown by the arrows
Step 4
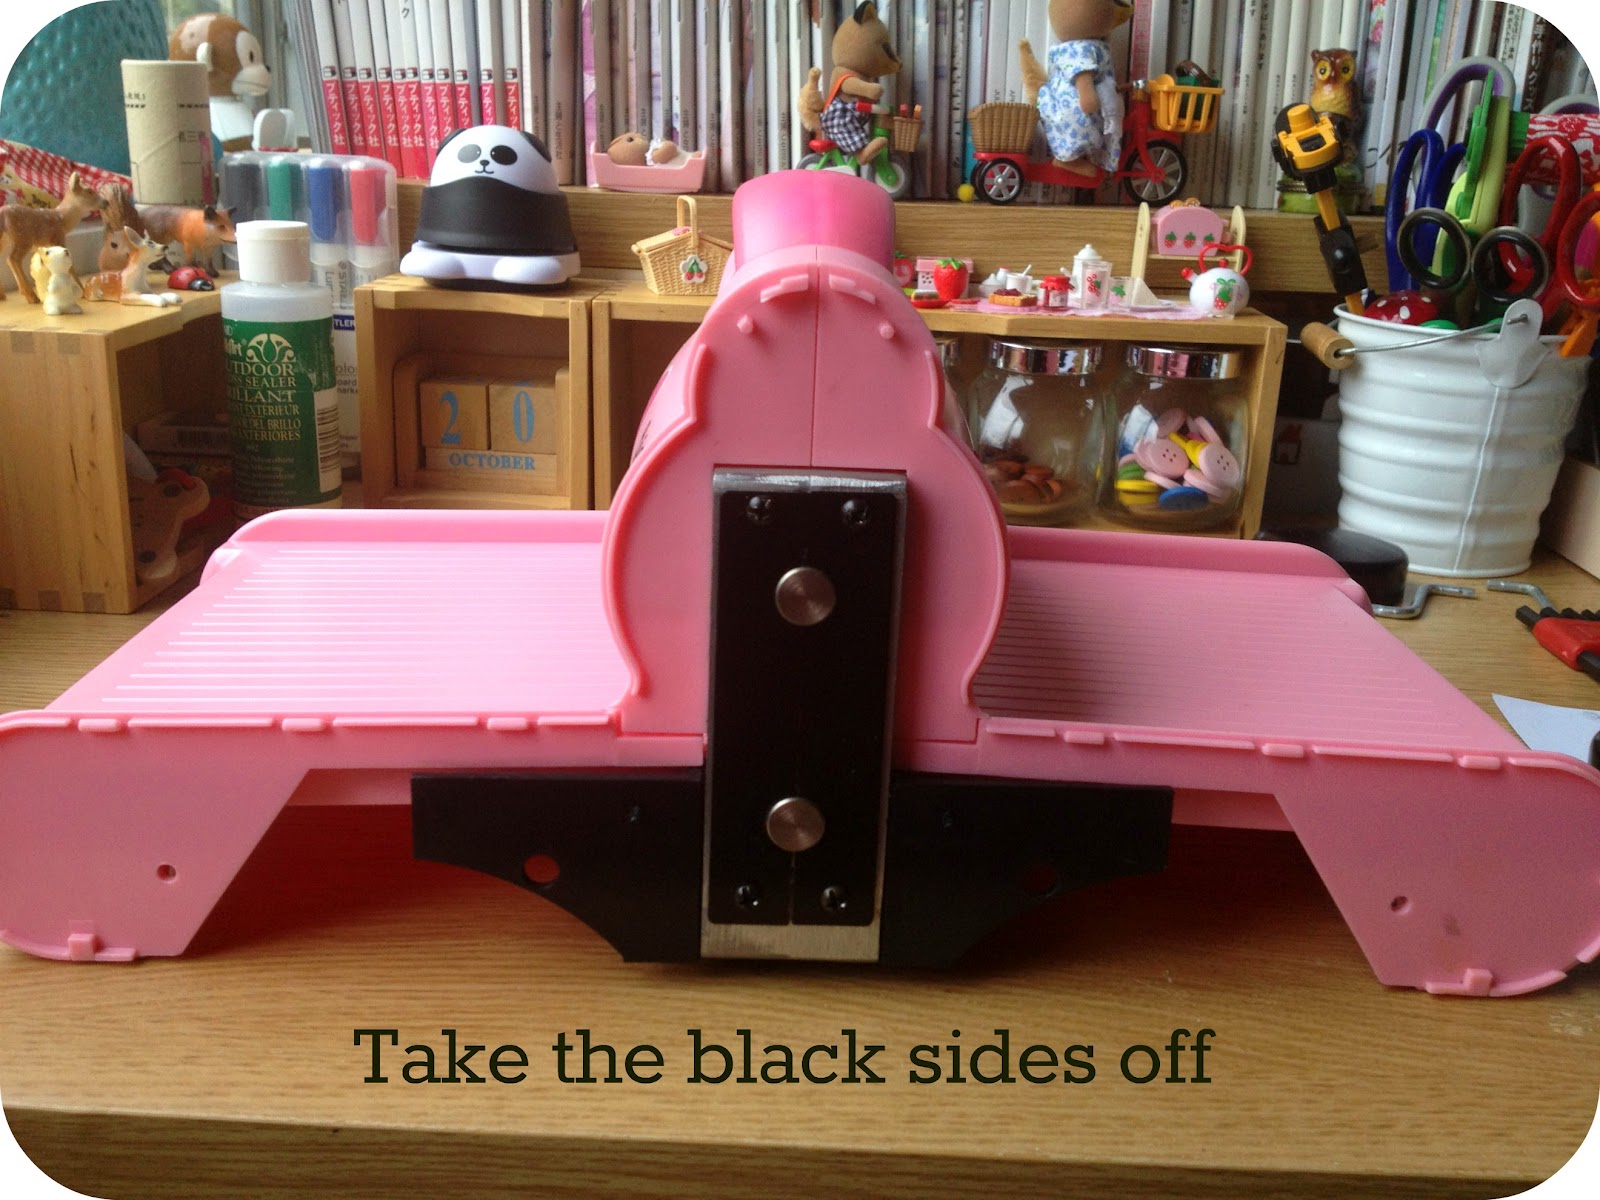
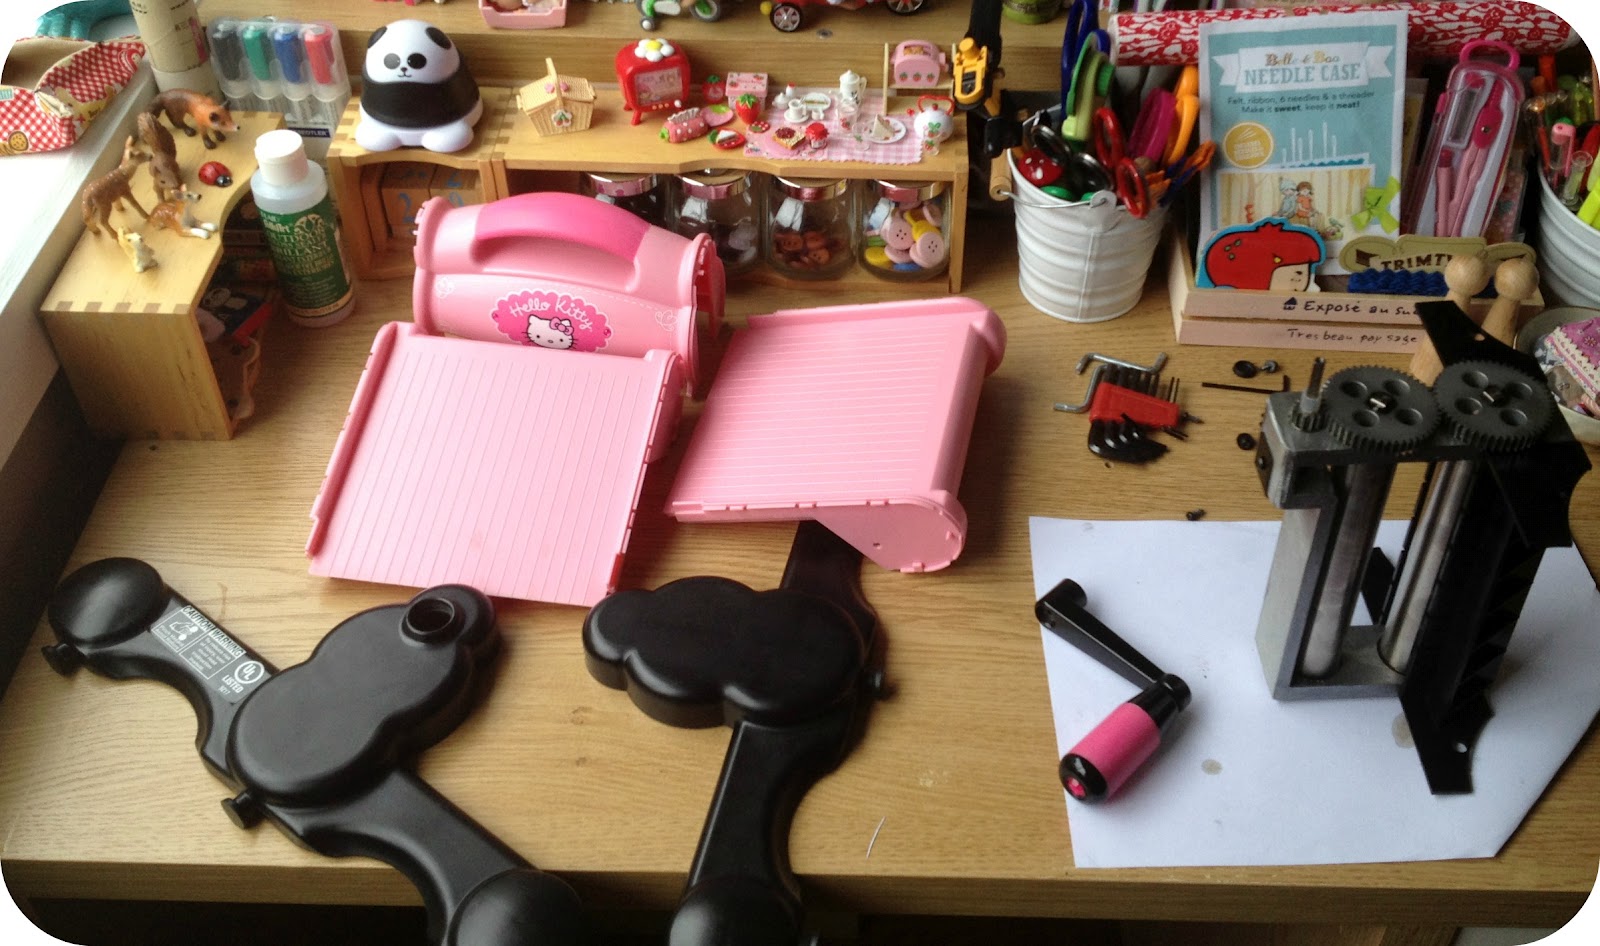
Once all the screw are taken off you will need to use some force to take off the black sides. They are clipped in but with some patience they will come apart.

 Step 5
Next is to take off the middle handle and then the plates either side these will come apart easy.
 All the parts should ow be off the main metal rollers.

Step 6
Next is to brush out any fluff in the rollers mine had a bit because it gets a workout with felt...
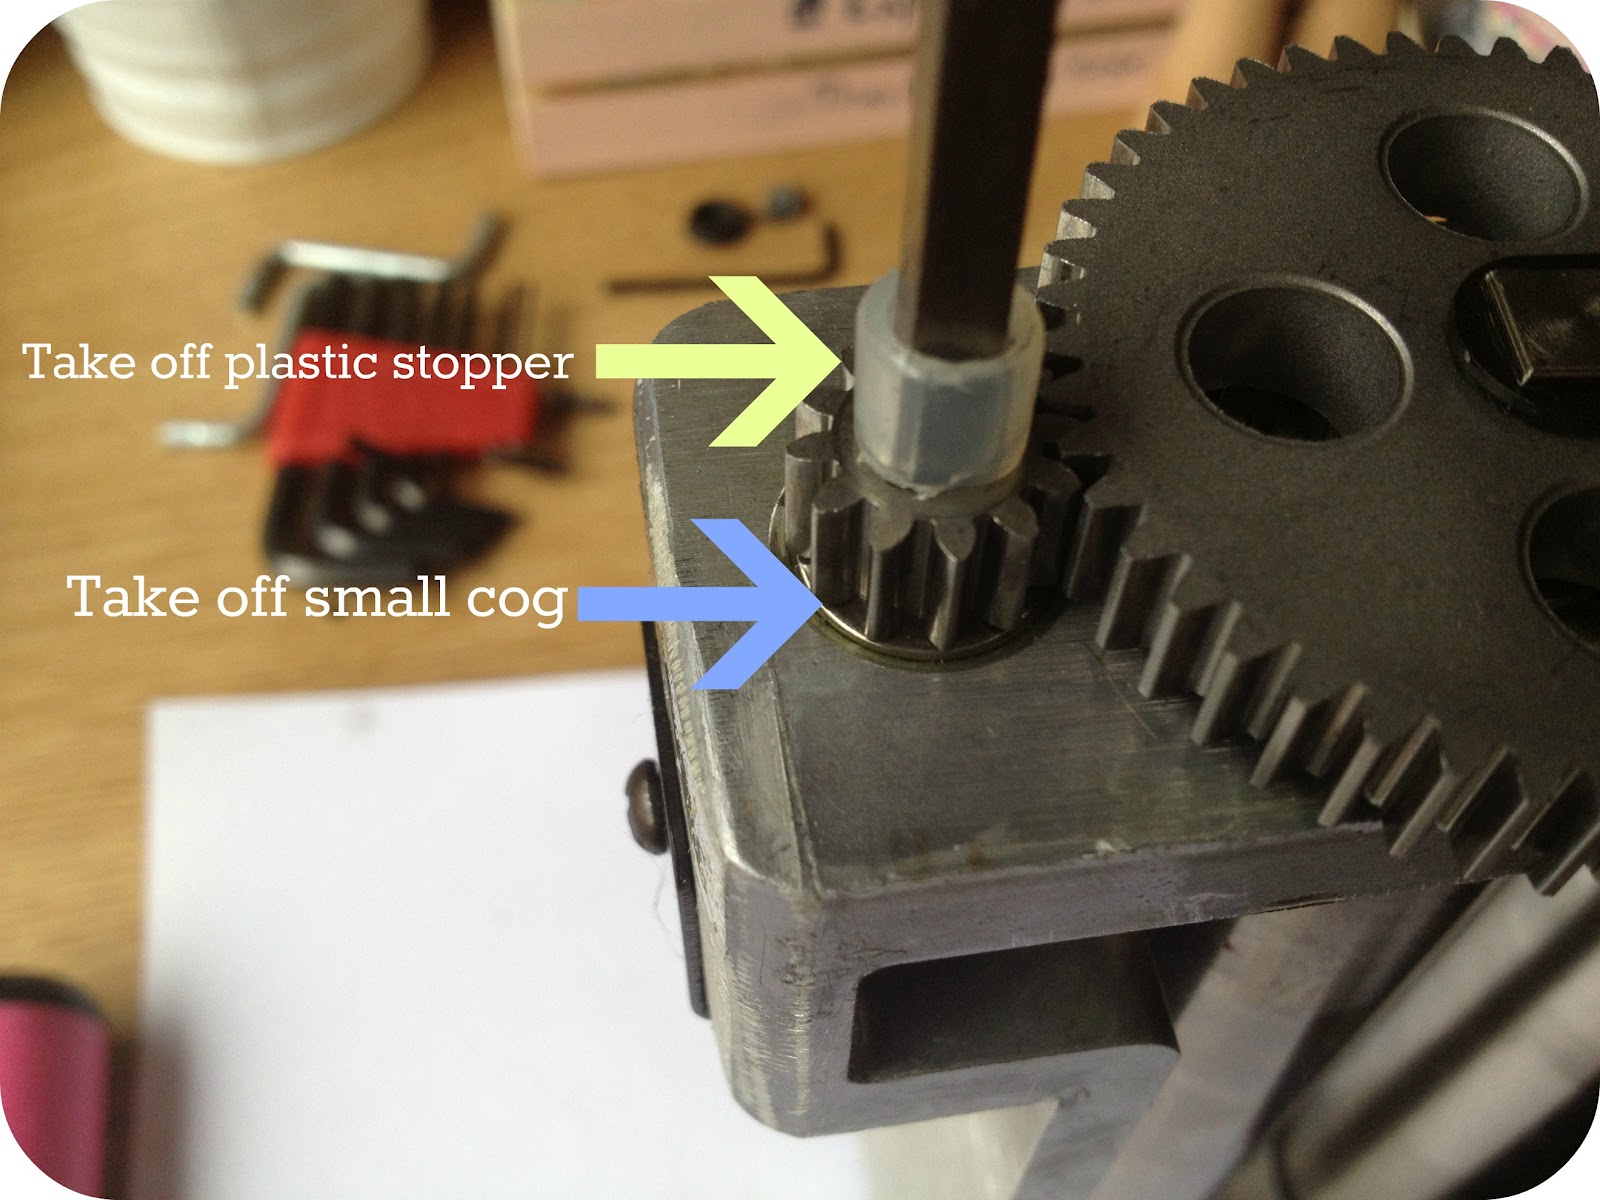
Take off the top small cog by pulling off the plastic stopper and then the cog.
Step 7
Now this is where my skateboarding days come in handy....underneath the cogs there are bearings very similar to the ones used in skateboarding wheels and if the get dirt and dust in them they tend not to move or get stuck. 
So to fix this put some sewing machine oil or any machine oil you have and put it on the bearings.

Step 8
Put the small cog and stopper back on... next slide the cranking handle on and give it a few turns all the cogs should move and this will send the oil into the bearings to lubricate them...After a few turns everything should be moving smoothly

Now to put it all back together
Just go backwards on the way you pulled it apart
Plates on first
Top carrying handle
Clip on sides and screw back in
Put cranking handle on
Use allen key to put back screw for cranking handle
Then place the black cap back

You should now have a fully serviced and function sizzix again
I hope this has helped anyone who has a broken sizzix and need to fix it

Happy crafting!!!!

Sunday, 4 December 2011

Make It - Deco Tape Ideas

...........I love using deco tape to decorate items in my craft studio here are just a few things I have made......

I have purchased most of my deco tapes from diaso I love this shop everything is $2.80AUD so here a a few pics of my recent purchases...

This tape has cats, bird cages, balloons, balls of yarn
and arm chairs on it a real cute french theme
This one is a lace tape with love heart and flower cut outs this one tends to go a bit see through so not so good for putting on dark colours
Japanese fabric tape I might use this one for some book binding great to put down the spine of your books before binding

 Japanese cheery blossom paper tape, this one can be torn and you can use punch stamps to make your own stickers 

Here I have used the lace deco tape around a coffee jar
Around a tea light glass holder

 and around a wood pencil


Make It- Kawaii Wooden Ruler

This is a very quick tutorial on how to make a plain wooden ruler into a very cute ruler......

Materials
- Wooden Ruler
- Fabric Glue
- Ribbon/lace
- Nail polish remover (only if your ribbon is see through)


Step 1 

Cut your ribbon to the length of your ruler


Step 2

 If your ruler has any text or brand on it and you are using ribbon or lace that you can see through do this step..... Using nail polish remover (I used the wipes) rub off the text/brand this might take some rubbing... you could also use some sand paper to rub it back....
Step 3

Put some fabric glue down the length of your ruler then
stick down the ribbon clean up any glue that comes out the sides....let it dry and now you have a cute ruler to add
to your stationary collection